This pipe cleaner dog kids craft is a cheerful hands-on project for kids, classrooms, and family craft time. It uses the tutorial steps below as the practical guide while adding helpful planning notes so the project feels easier to prepare, follow, and finish. Gather the supplies first, give yourself a little workspace, and enjoy making something creative from simple materials.
Materials:
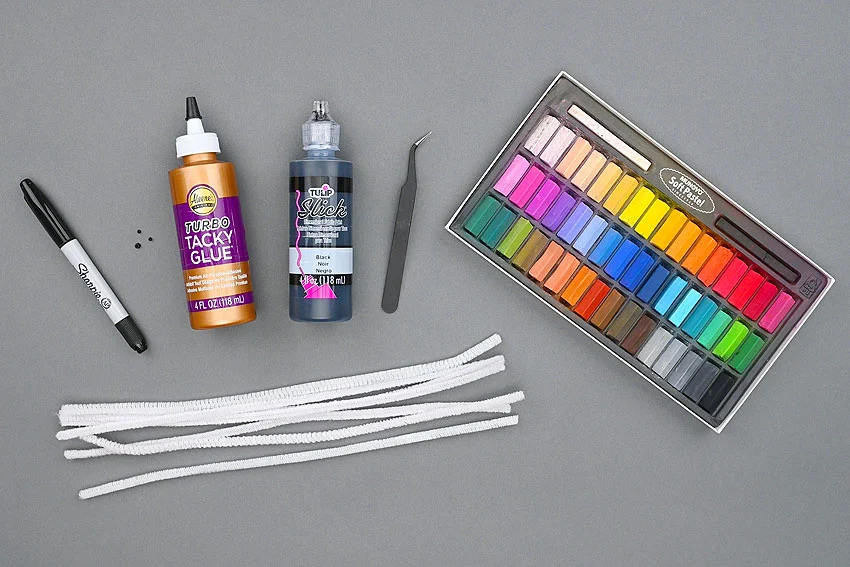
- 7 White pipe cleaner(s) (or other colour)
- Tacky glue
- Round black beads (3mm x 1; 2mm x 2)
- Chalk pastels
- Black puffy paint (optional)
Equipment:
Instructions:
Step 1: Find what you need
- Gather your supplies and materials.
Step 2: Make the head
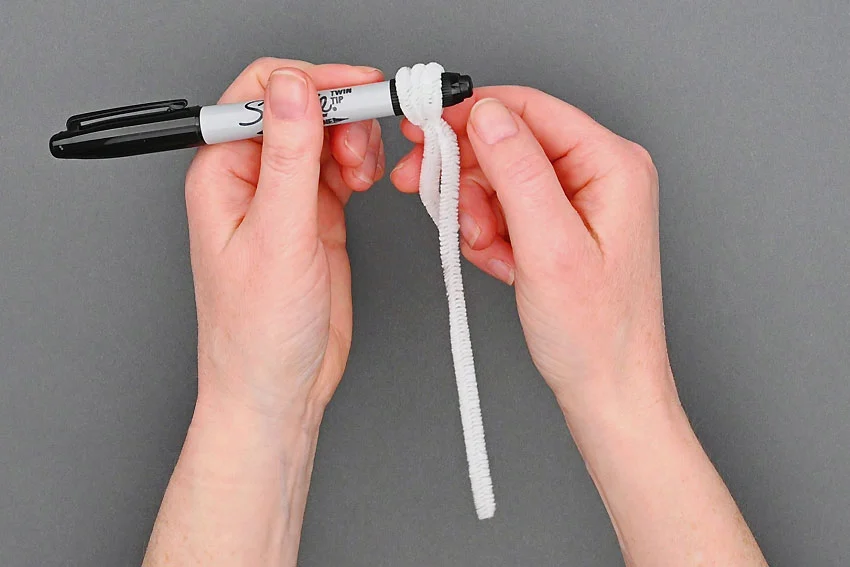
- Leaving a 1-1/2 inch tail, wrap a white pipe cleaner tightly around the end of a Sharpie marker 3 times.Then twist the ends of the pipe cleaner together, right next to the marker, and remove the marker.
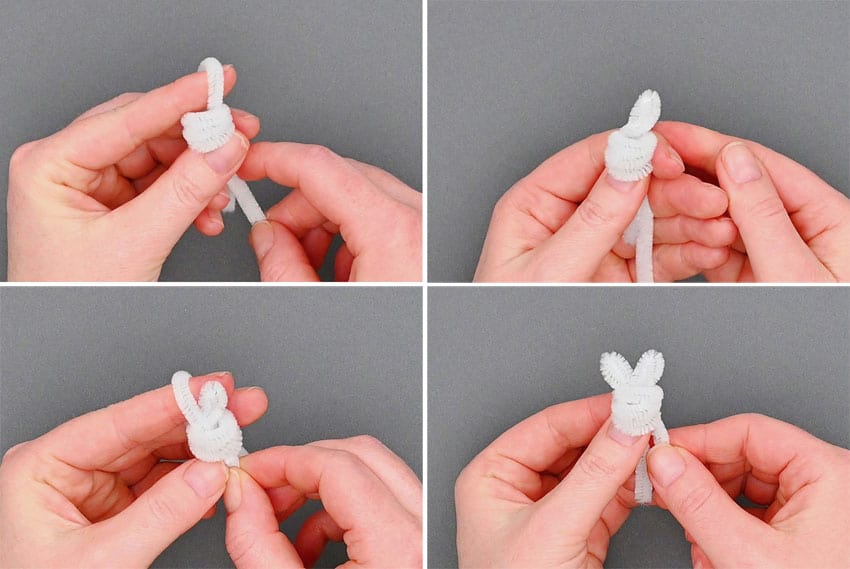
- Push the longer end of the pipe cleaner down through the loops, leaving a finger’s width loop at the top.Remove your finger and twist the loop once to secure it. Bring the pipe cleaner back up and repeat, creating a second ear.
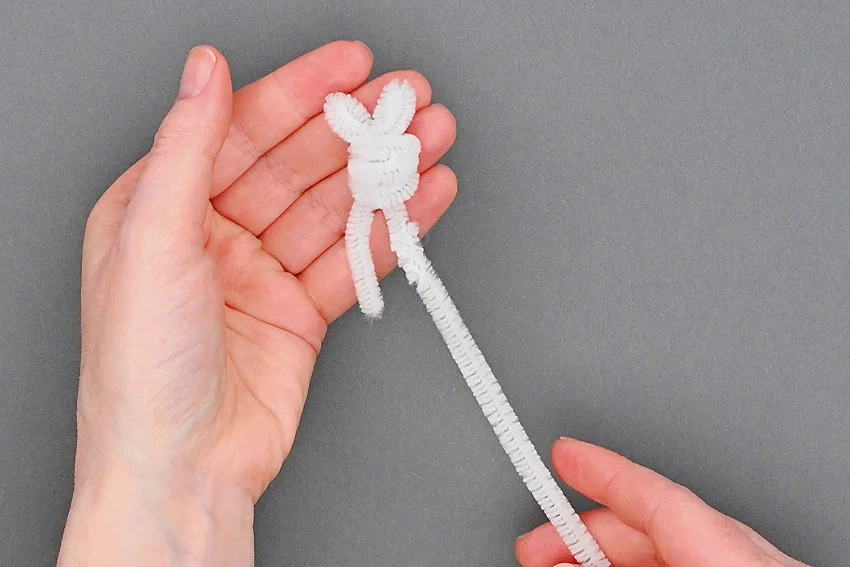
- Attach a second pipe cleaner, twisting it to the end that just came through the loops. Then twist the 2 ends together a couple times below the loops.
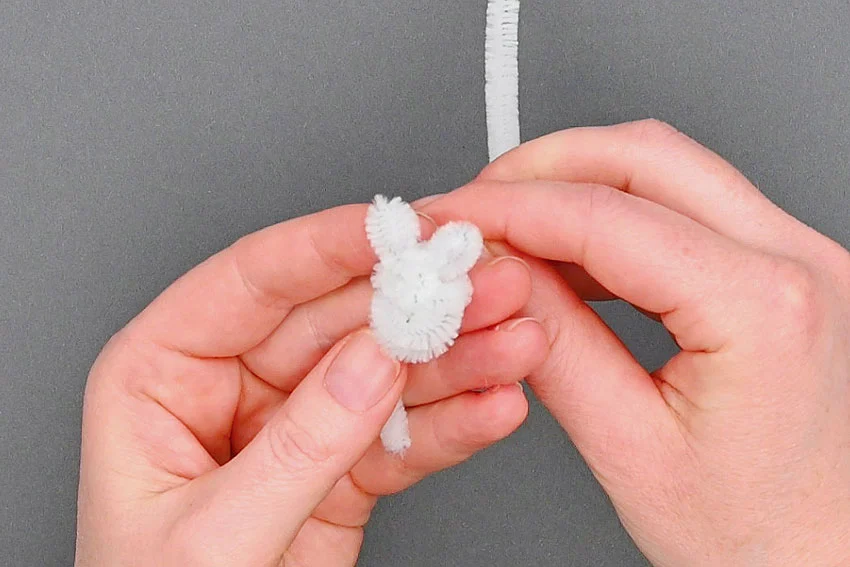
- Bring the long pipe cleaner end up through 2 loops. Then push it to the outside in front of the 3rd (top) loop in the center.Push the pipe cleaner between the 2 ears and down the back of the head.
- Repeat the last step 2 more times, bringing the pipe cleaner to the right and left of the first, so you have 3 vertical lines between the ears.Repeat again, layering another line in the center. Twist the pipe cleaners below the loops to secure them.
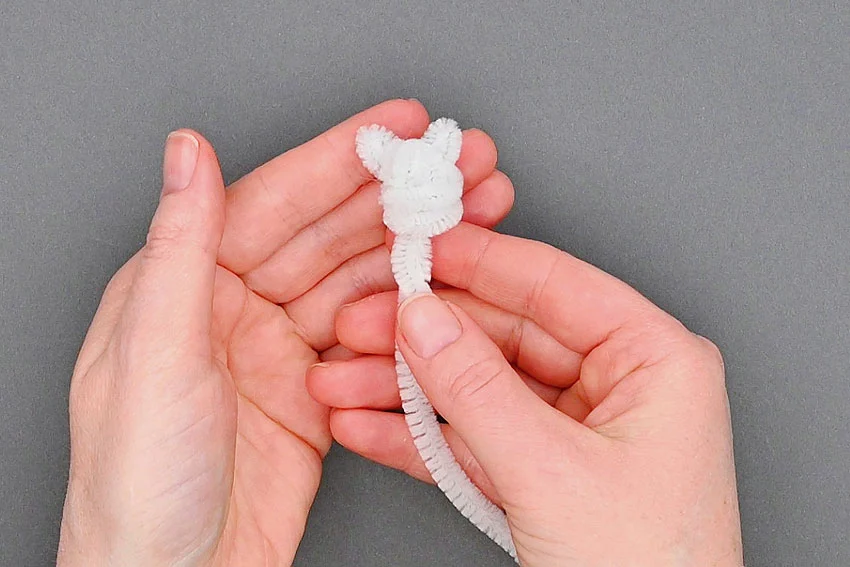
- Pull the bottom loop up and over the 2nd loop, bringing it to the middle. Then pinch this loop slightly, shaping the snout.
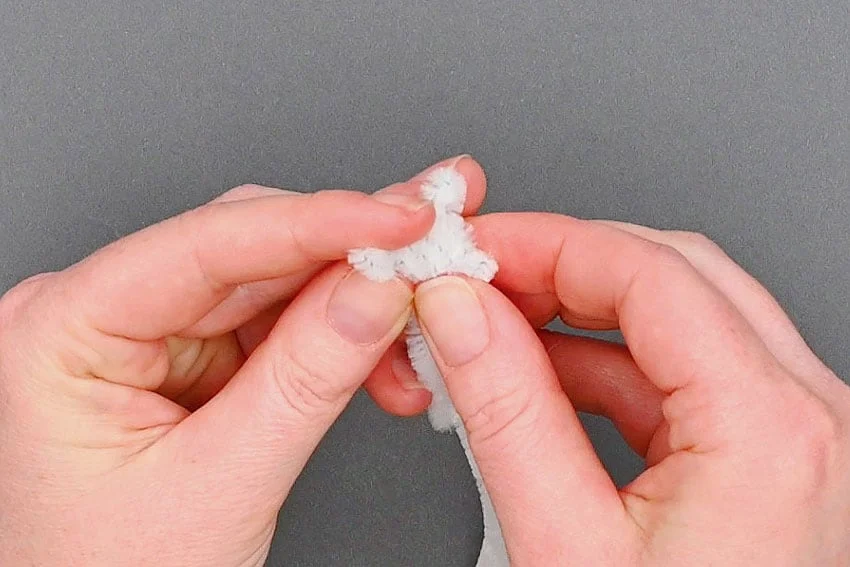
- Wrap the longer pipe cleaner around the snout to give it more definition. Then twist the 2 ends together below the head.
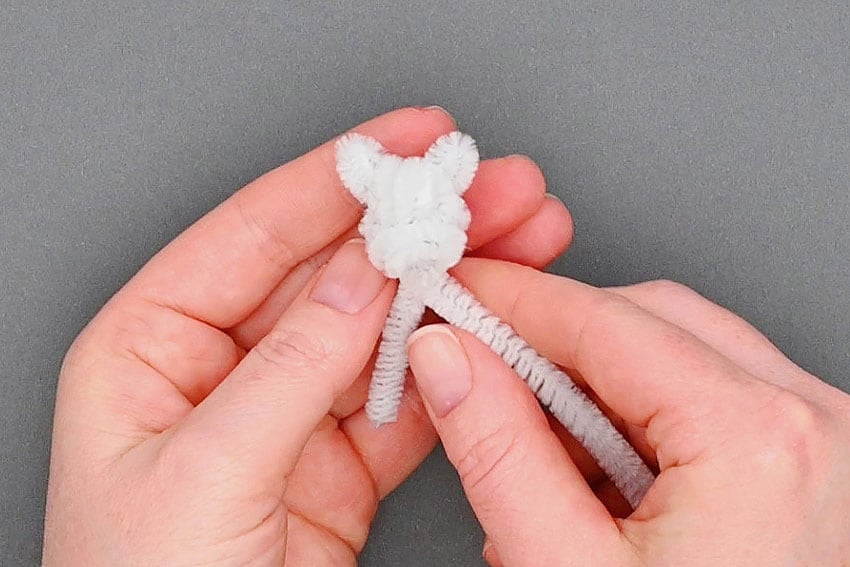
Step 3: Create the legs and tail
- Fold the longer pipe cleaner back on itself 1-1/2 inches from the head. This is a front leg.
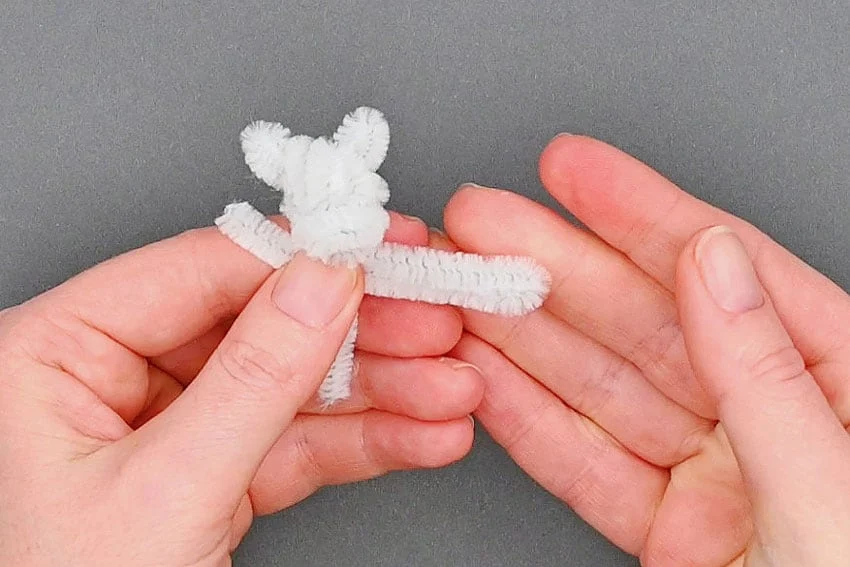
- Then connect another pipe cleaner to the end of this section, twisting them together.
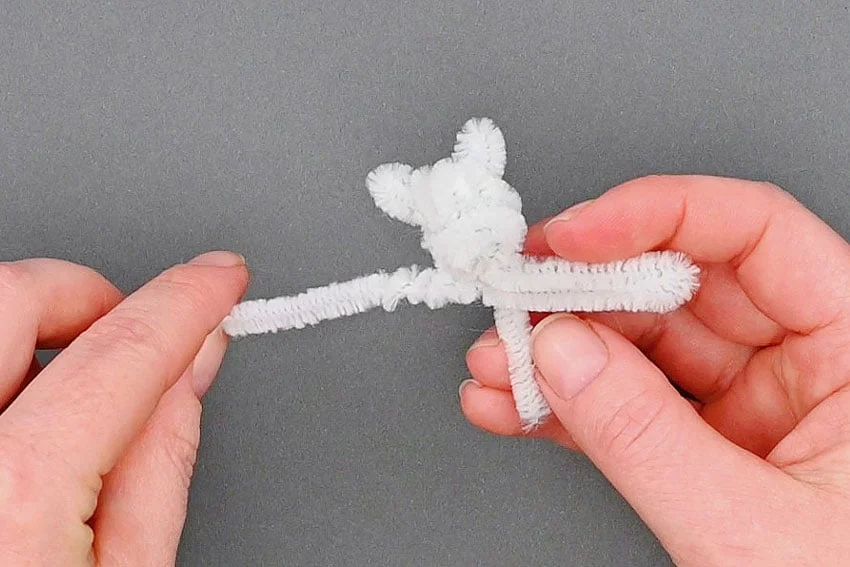
- Fold this pipe cleaner back to the right, creating another front leg. Twist it around the other pipe cleaner and bring the long end down.
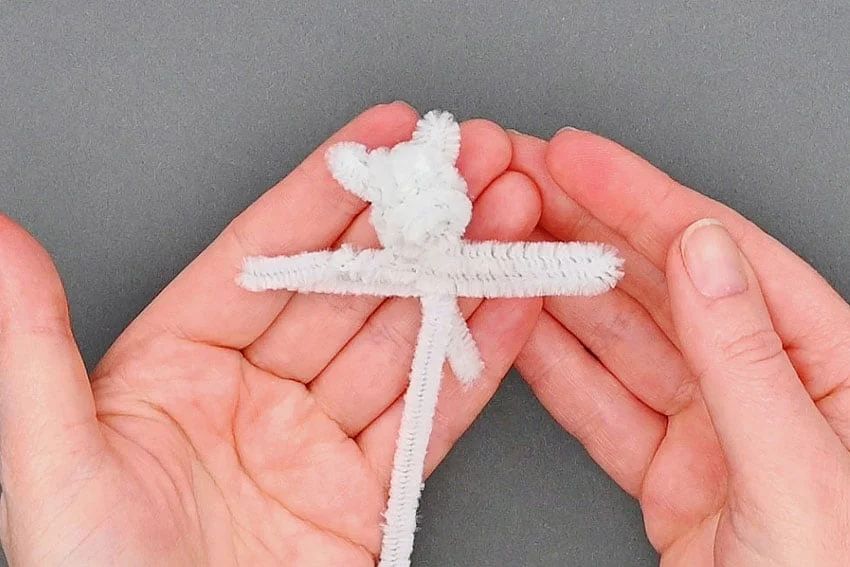
- Twist each leg, from near the head to almost the end, leaving a 1/4 inch section at the end untwisted to be a paw.
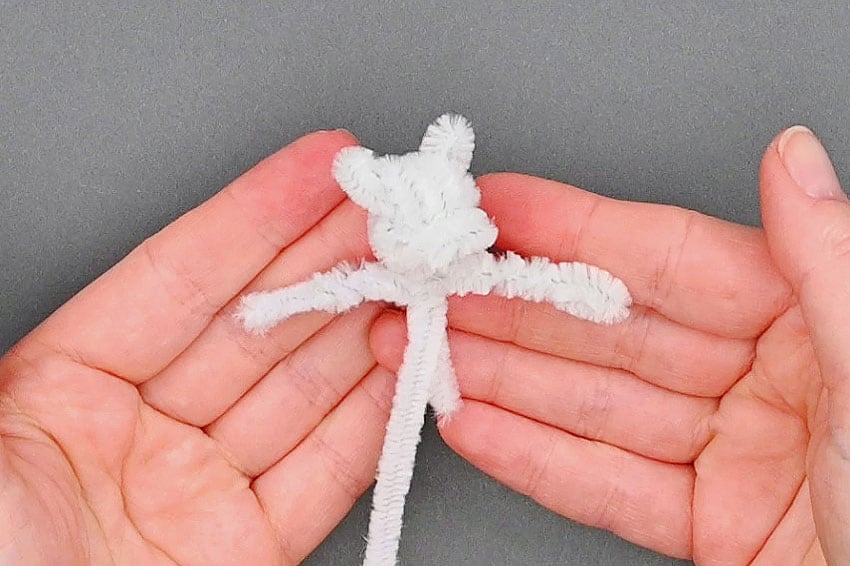
- Bring the long pipe cleaner down straight from the base of the head about 1-1/2 inches. Fold the pipe cleaner out and back in on itself, creating a back leg that’s a tiny bit longer than the front ones (1-3/4 inch).Repeat on the other side. Twist these legs from about 1/3 way out, again leaving 1/4 inch paw at the end.
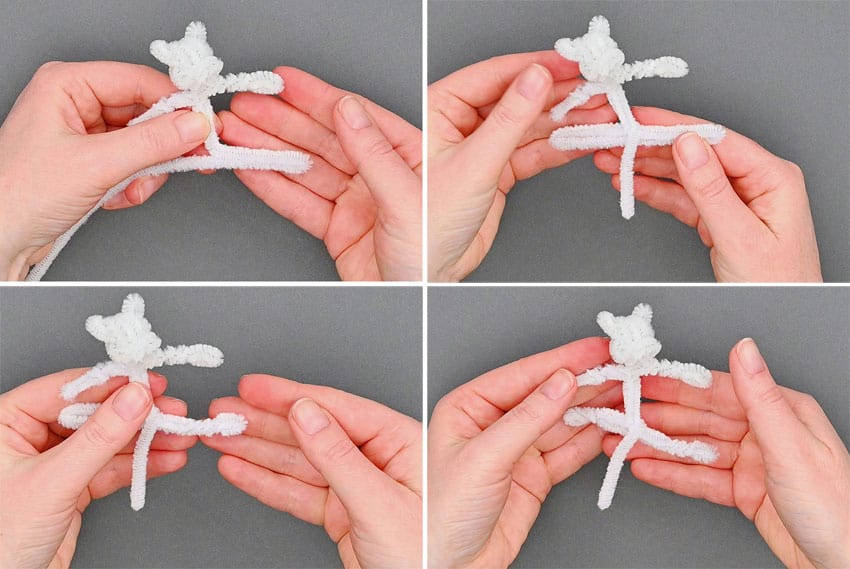
- Attach another pipe cleaner and fold it back towards the body, leaving a 1 inch tail. Twist the tail together from the base until half way up the tail.
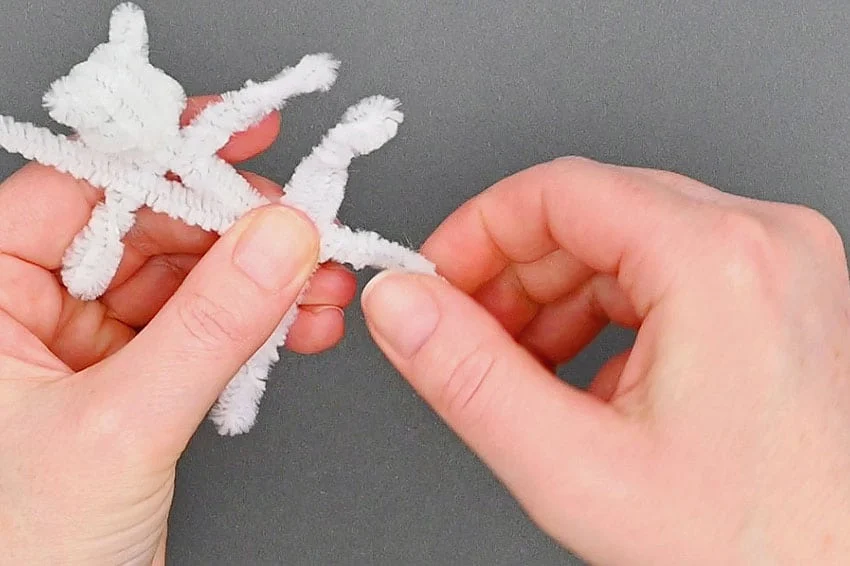
Step 4: Wrap pipe cleaner around the body
- Wrap the long pipe cleaner around the body of the dog, going from the base of the tail up towards the head.Bring it up between the front legs, around the back of the neck, and back down between the front legs. Then continue wrapping it around the body, back down towards the tail.
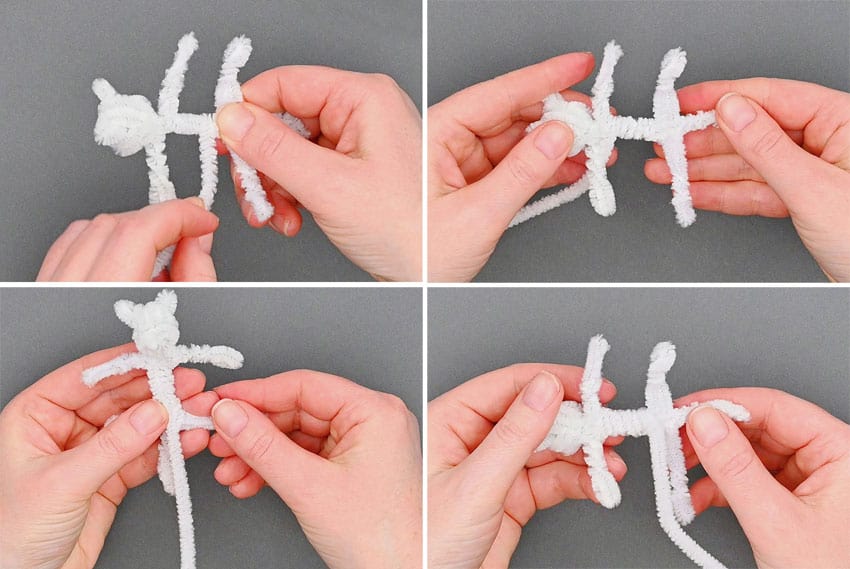
- Fold the tail up towards you. Bring the pipe cleaner from the back, between the legs, around the tail and back down over the leg.Continue wrapping around the body, from back to front again. Add a pipe cleaner wherever you get near the end.
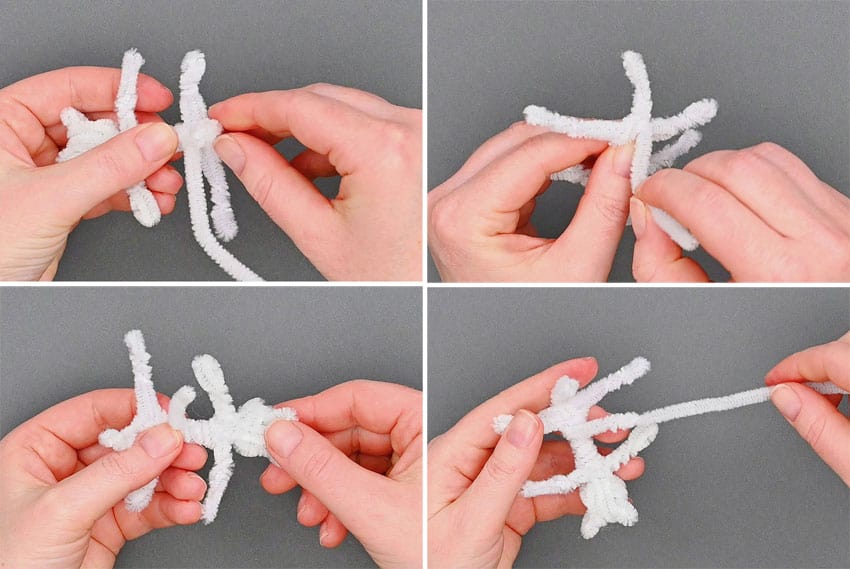
- Repeat the wrapping process, going around the head and the tail each time you reach it. Continue, adding another 2 pipe cleaners when needed.
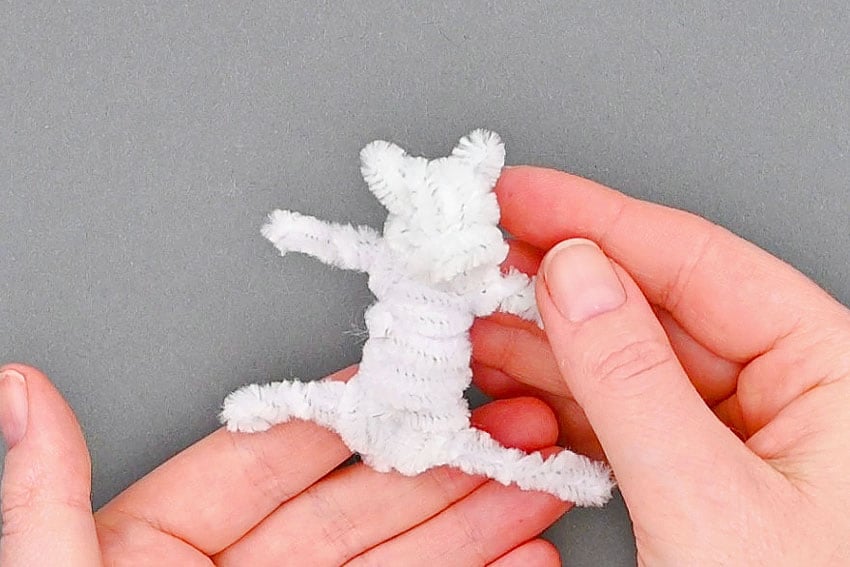
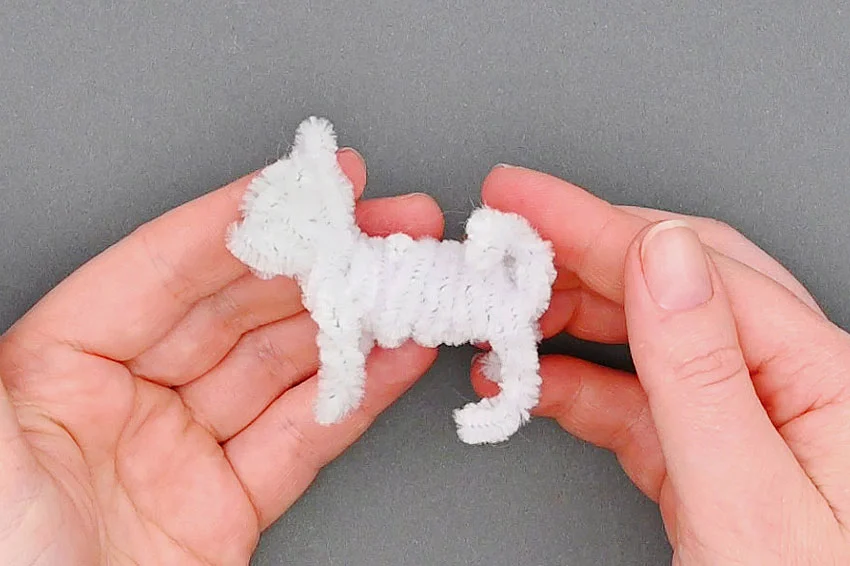
- Bend the limbs and head into place, positioning the dog how you’d like (sitting or standing). Then bend the paws so they’re facing forward and curve the tail however much (or how little) you’d like
Step 5: Add the details
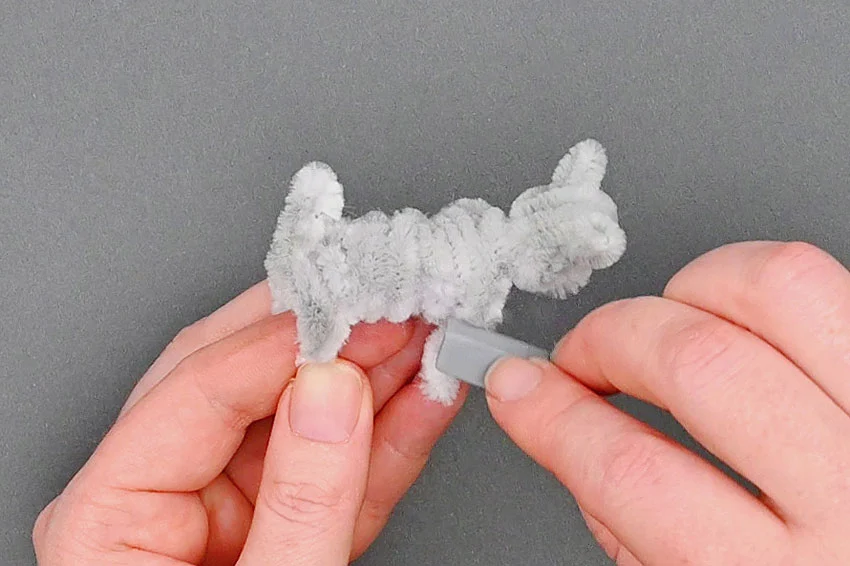
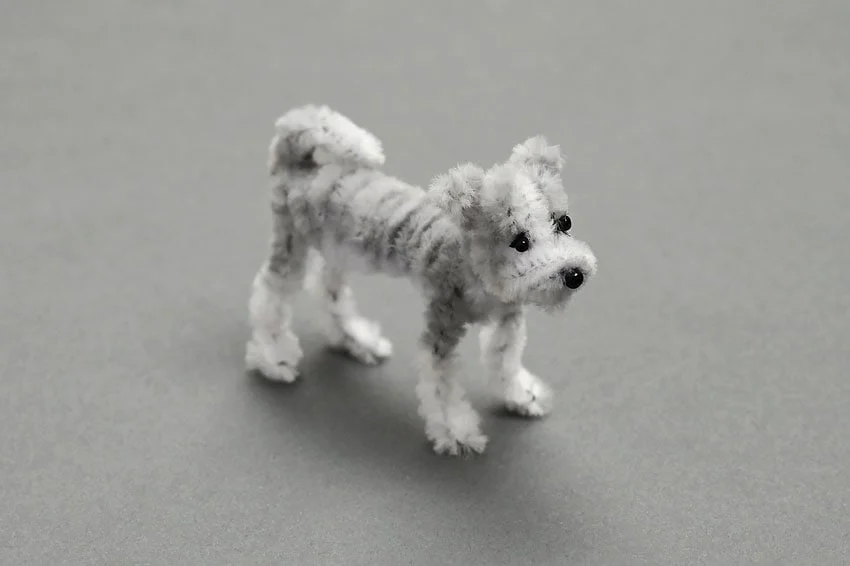
- To add colour to the dog, rub a soft pastel onto the pipe cleaners. We added grey pastel over both sides of the dog’s face and ears, leaving the snout and a stripe up between its eyes white.Then we covered the back and half of its tail, as well as going halfway down the outsides of the legs.
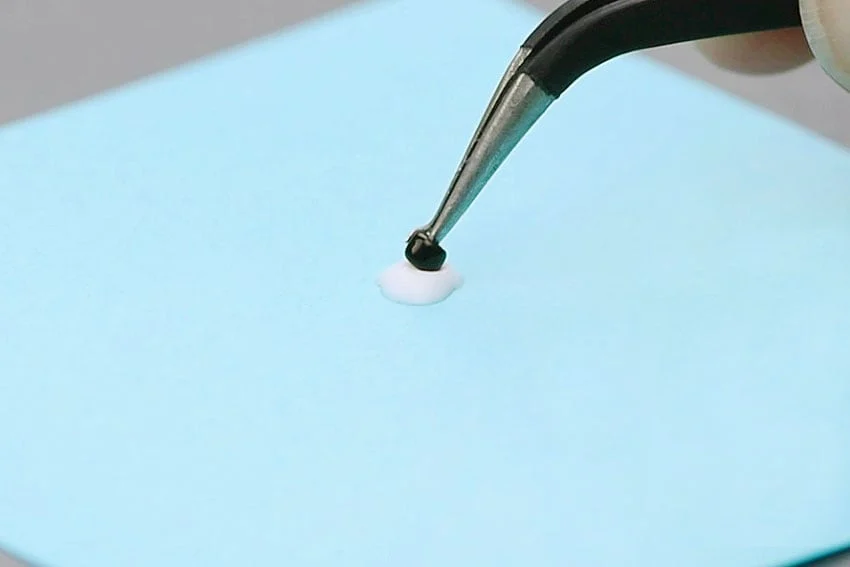
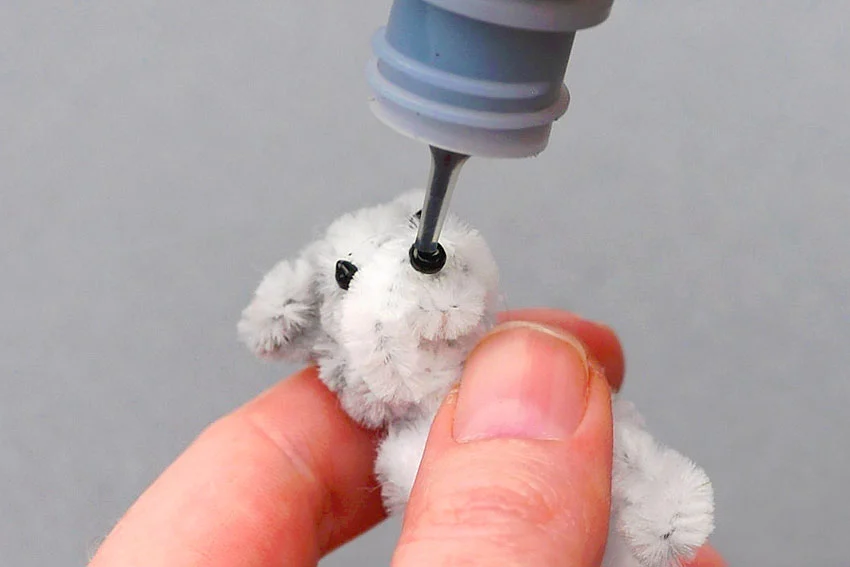
- To attach the bead eyes and nose, pick up a bead with fine tipped tweezers and dip it into tacky glue.
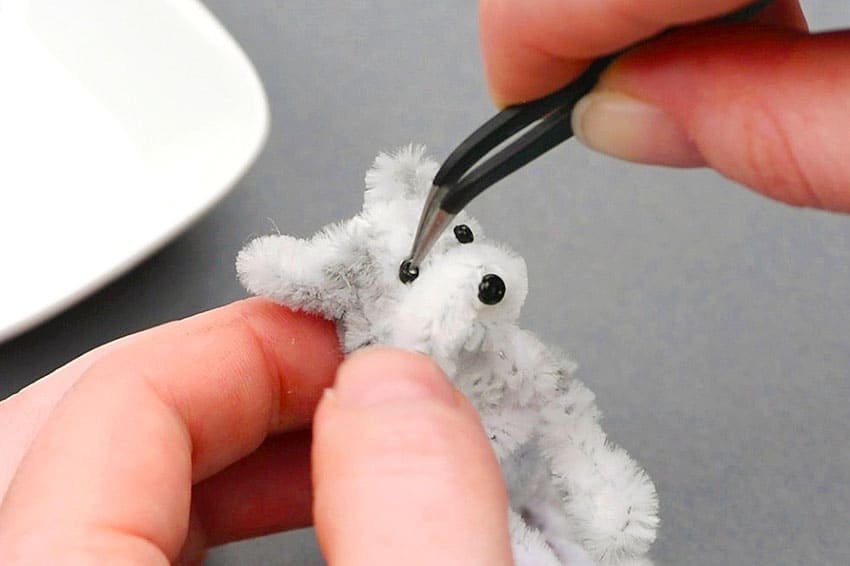
- Use the tweezers to place the eyes and nose onto the pipe cleaner dog.
- Optional: Then once the glue is dry, fill in the holes of the bead with small dots of puffy paint.
- Your pipe cleaner dog is complete!
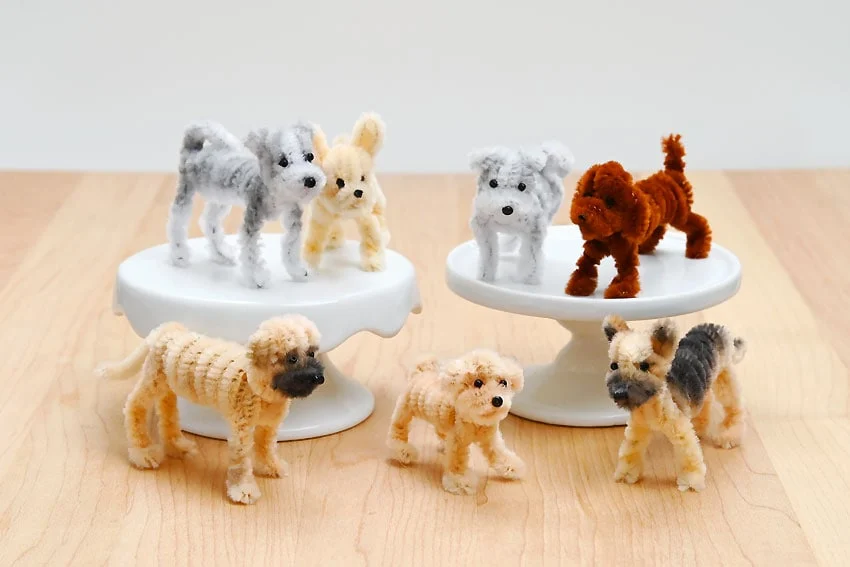
- Experiment with different ear shapes, tail lengths, sizes, and colours to make different breeds of pipe cleaner dogs!
Helpful Tips
- Read through the full tutorial before starting.
- Prepare the listed supplies ahead of time so each step is easier to follow.
- Check the finished craft against the instructions before displaying or using it.
FAQs
Is this tutorial beginner friendly?
Yes. This pipe cleaner dog kids craft is written with simple steps and extra tips for beginners.
Can kids make this craft independently?
Older kids may be able to work independently, while younger kids should have help with any steps that require close attention or small pieces.
How long does the craft take?
Most versions take about 30 minutes, depending on the materials and the pace of the crafter.
Can I use different colors?
Yes. Changing the colors is one of the easiest ways to personalize the finished craft.
Final Thoughts
Once the pipe cleaner dog kids craft is finished, take a moment to check the details, compare the result with the tutorial, and display the project somewhere kids can enjoy their work.
Affiliate disclosure: This post may contain Amazon affiliate links. As an Amazon Associate, Easy Crafts Ideas may earn from qualifying purchases at no extra cost to you.