

This paper plate flowers paper craft is a cheerful hands-on project for kids, classrooms, and family craft time. It uses the tutorial steps below as the practical guide while adding helpful planning notes so the project feels easier to prepare, follow, and finish. Gather the supplies first, give yourself a little workspace, and enjoy making something creative from simple materials.
Materials:
- 4 Paper plates (9 inch size)
- paper fastener
Equipment:
Instructions:
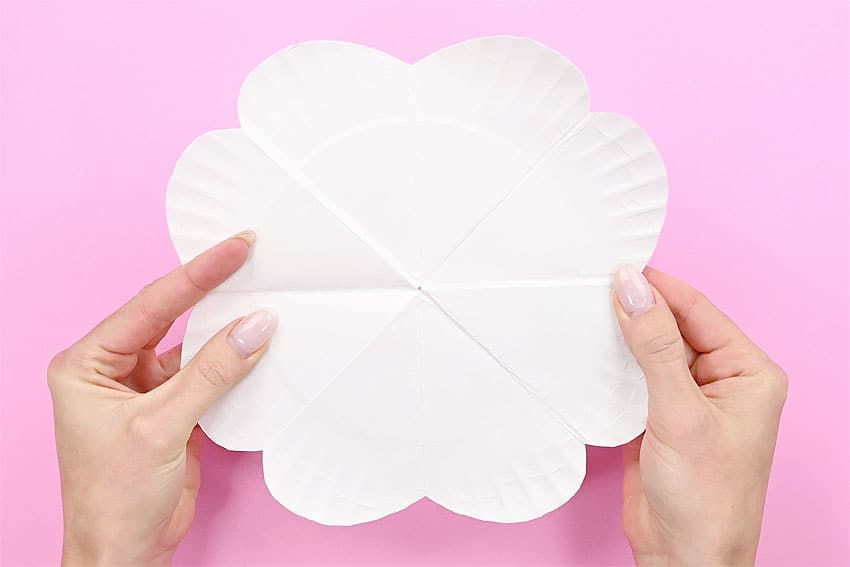
Step 1: Fold paper plates
- Fold one paper plate in half. Fold it in half again. Fold it in half one last time.Repeat this process with the remaining plates (three more times).
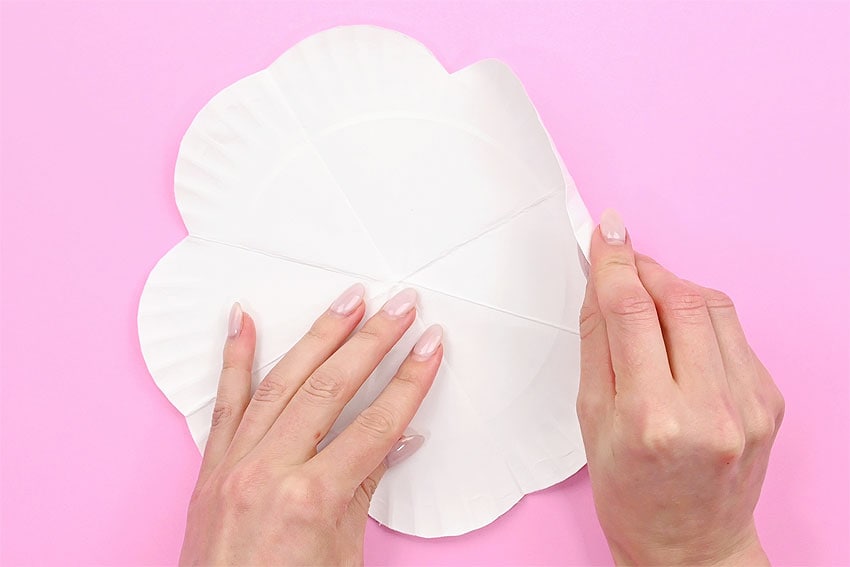
Step 2: Cutting edges
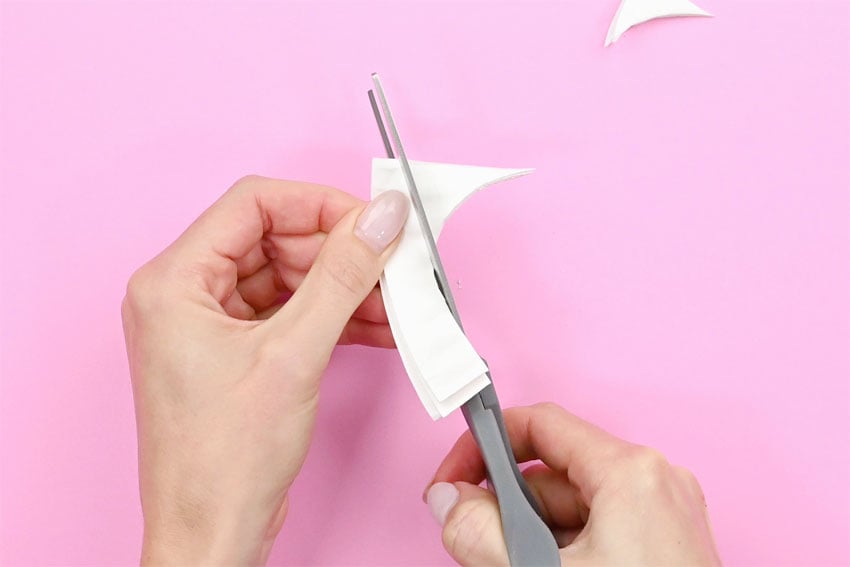
- Draw a guideline for cutting off the edge of the flower. The line should be deeper on the left side.
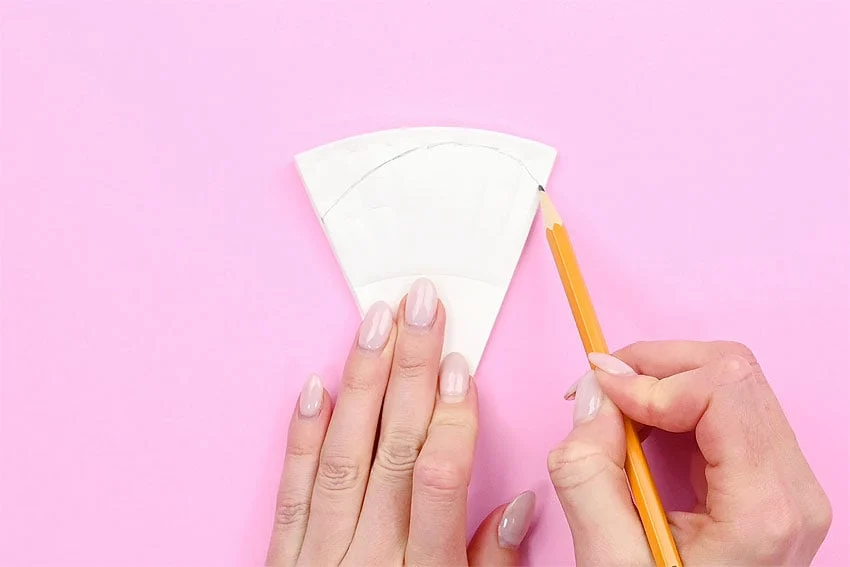
- Cut the plate on this guideline.
- Draw guidelines on the remaining paper plates, a little deeper each time. Make these lines even on both sides.

- Cut the other three plates. Save the 3 scraps you cut off (they will be used later for the flower’s center).
Step 3: Make holes in middle of plates
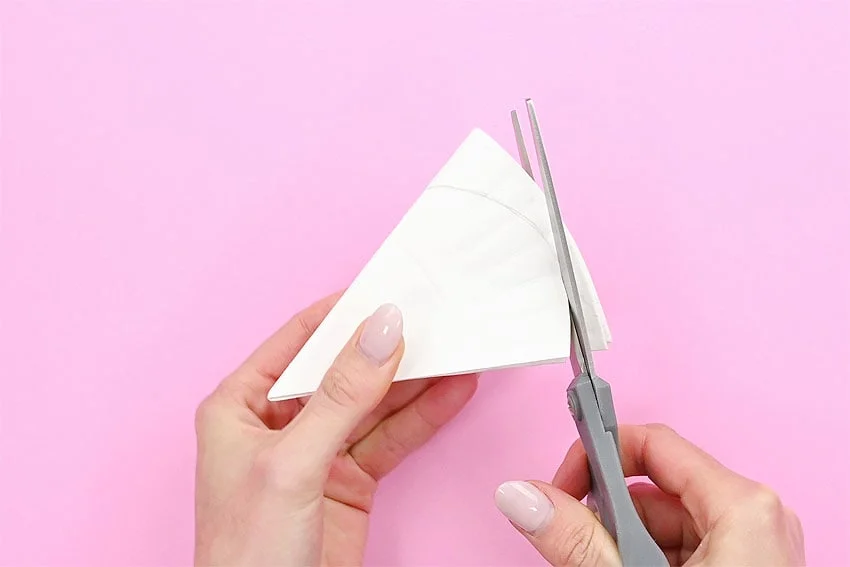
- Using scissors, cut the tiniest tip off the folded plate.
- Do this for all four plates, creating a tiny hole in the center of each plate.
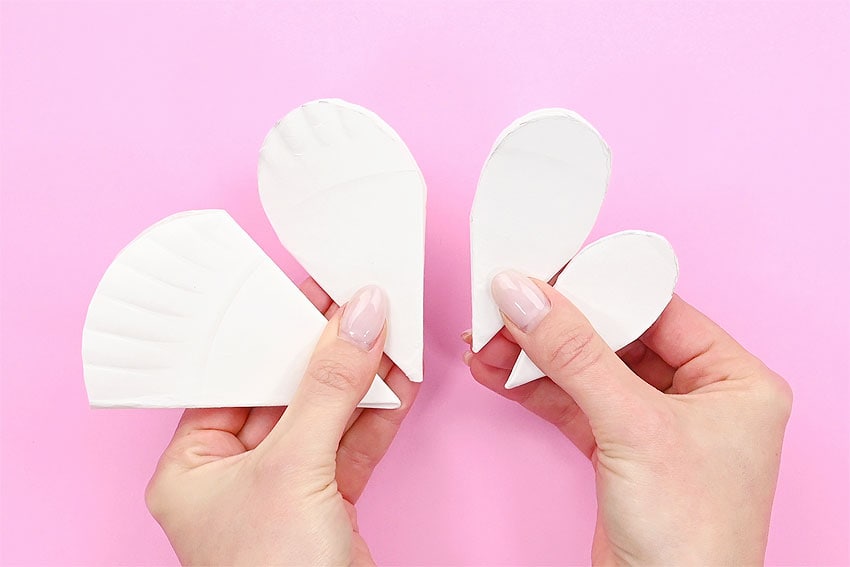
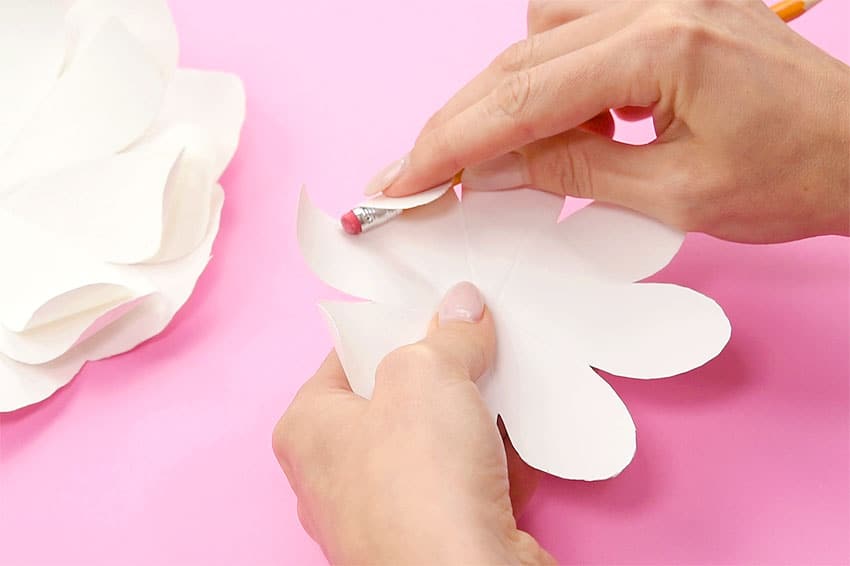
Step 4: Curl the edges of the flower
- Unfold the plates and use your fingers to curl the edges up on the largest plate.
- Use a pencil to curl the petals of the other three plates.
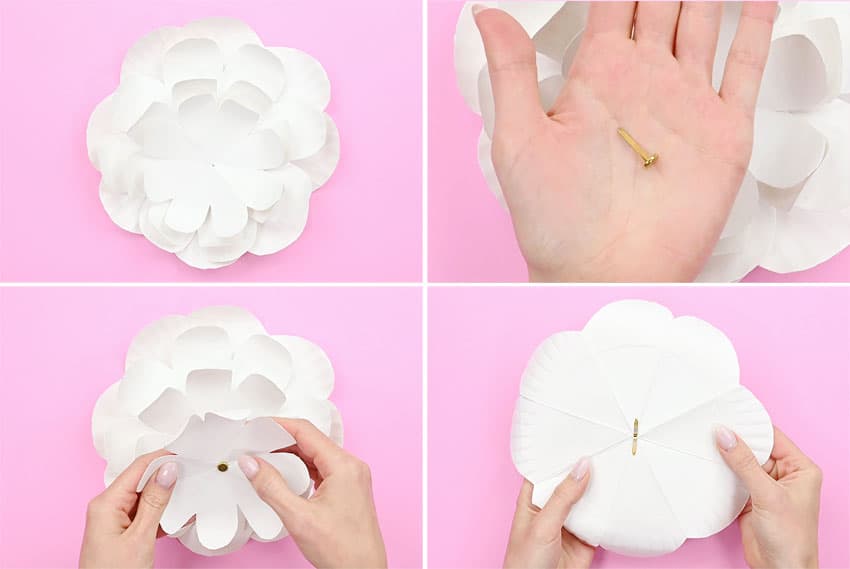
Step 5: Connect paper plates
- Place the paper plates on top of one another, the largest on the bottom.Put a paper fastener through the center of the plates and push the edges down, fastening it on the back of the flower.
Step 6: Make the center of the flower
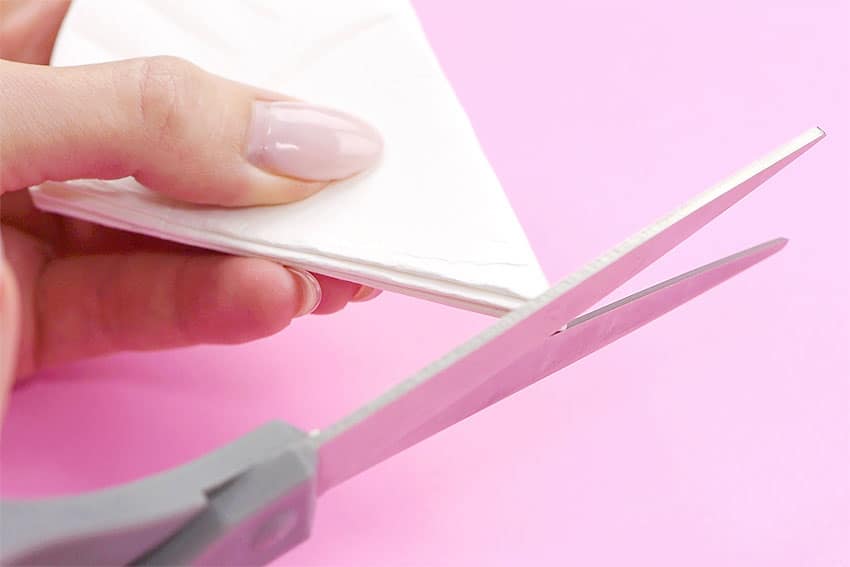
- Take one of the scraps you set aside (when cutting the paper plates) and cut off the bottom pointed parts, creating a curved edge to match the outside edge of the plate.
- Make repeated cuts along the inside of this edge piece, creating a “fringe”.
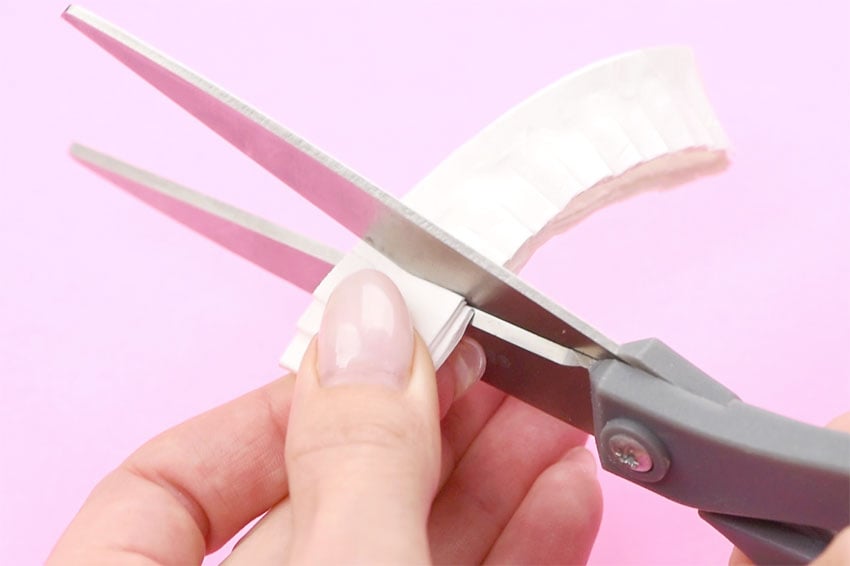
- Repeat this process with the other two plate edges.
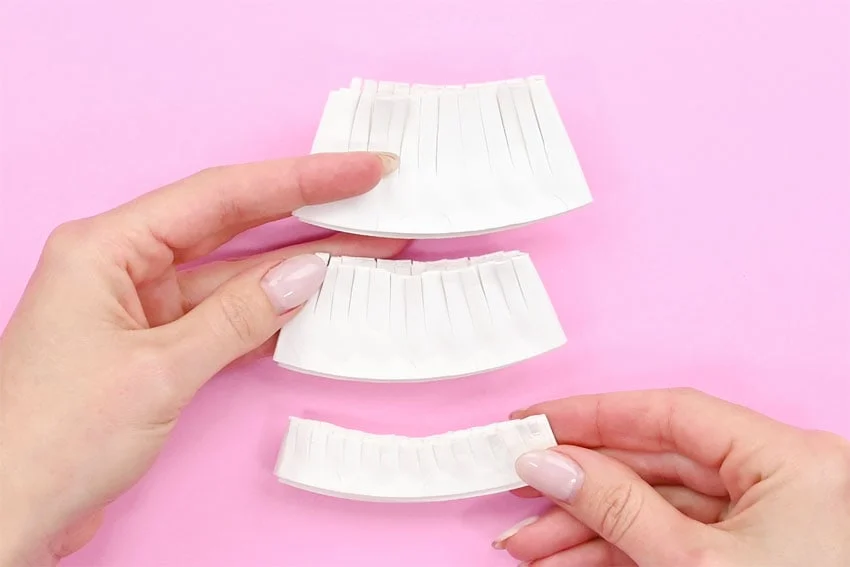
- Unfold the smallest fringe and cut through it, creating one long strip. Beginning at one end, start rolling the strip. Add a bit of hot glue, and continue rolling. Keep rolling and adding glue.Leave the last 2 inches unglued.
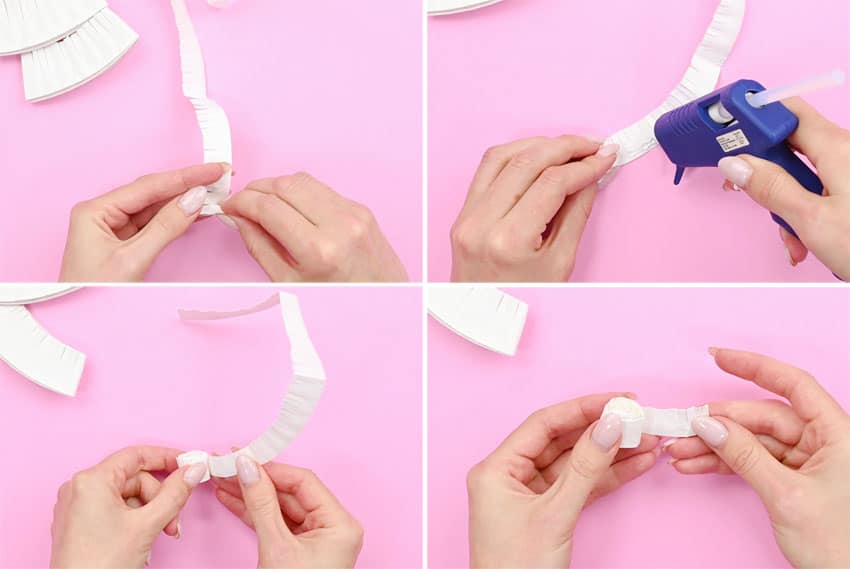
- Unfold and cut the next largest fringe. Add hot glue to the inside of the loose part of the smallest fringe.Attach the first fringe roll to one end of the second, making sure to keep the fringe on the same side.Continue rolling and adding hot glue, as with the previous fringe. Again, leave the last two inches unglued.
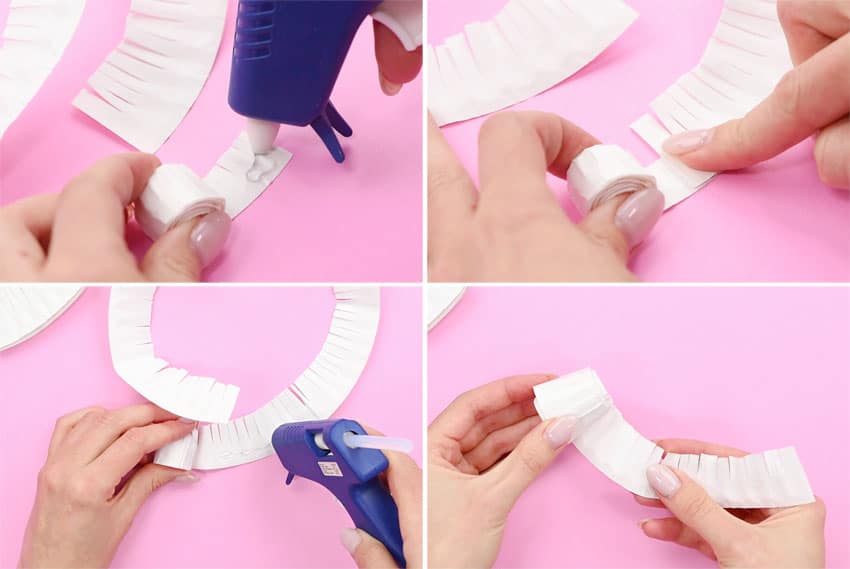
- Repeat this process, connecting the largest fringe to the previous two, this time gluing it together until the end.You’ve created the flower’s center!

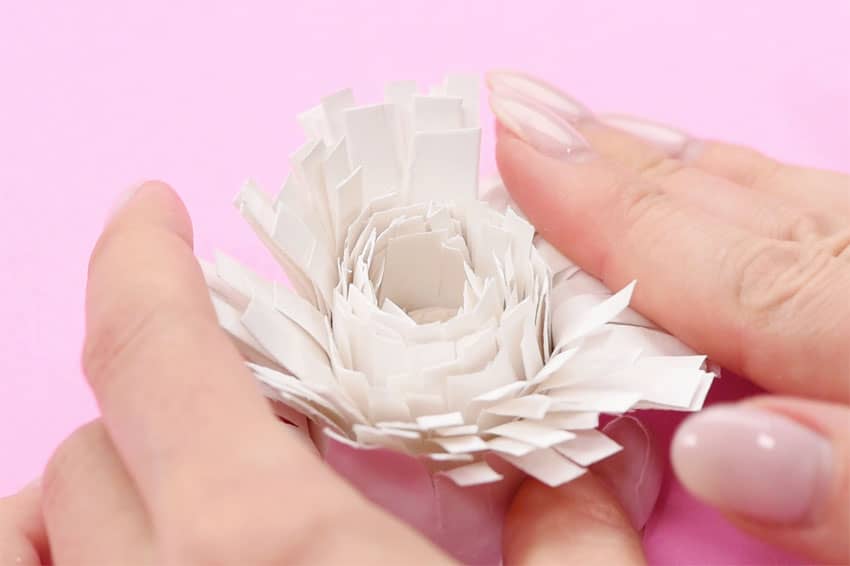
Step 7: Arrange and attach center
- With the cut side of the fringe up, begin bending down the outside cut pieces, creating a sunflower look.Repeat with the next inside layer of cut pieces.
- Add hot glue to the bottom (rose looking) part of the flower center.
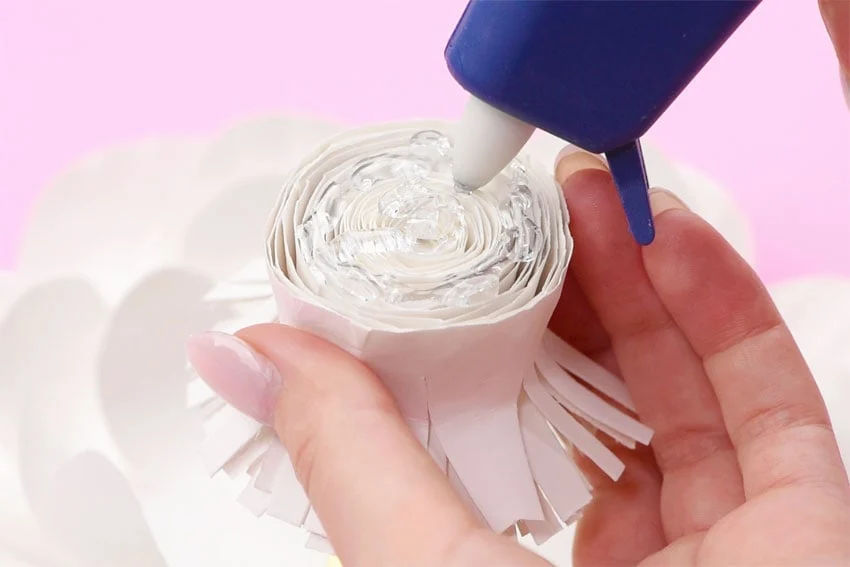
- Attach this piece to the center of the connected plates.

Step 8: Secure flower
- Arrange the petals of the large flower, turning and adjusting them as you like.Use hot glue to attach the bottom plate to the one above it. Glue close to the center and push the plate on top down to connect them. Repeat for all layers until the flower pieces are secure.
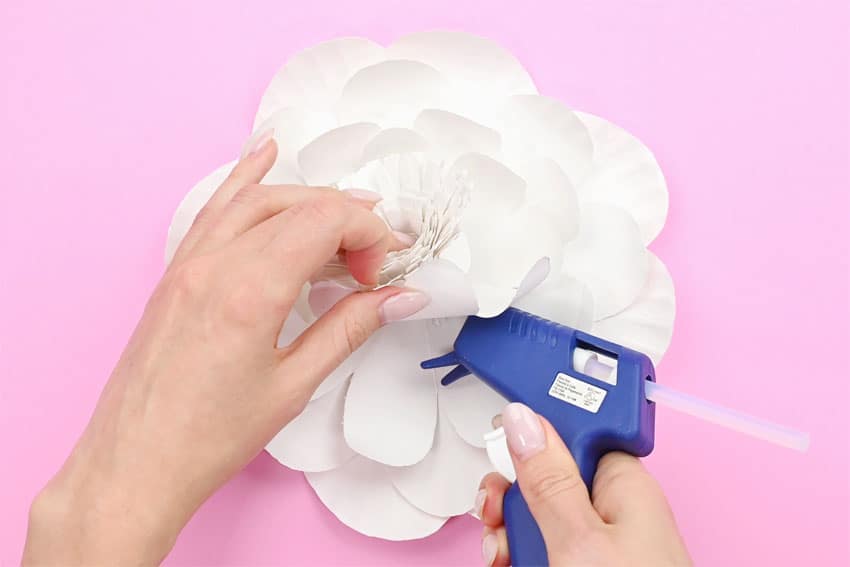
- Your paper plate flower is complete!

Helpful Tips
- Read through the full tutorial before starting.
- Prepare the listed supplies ahead of time so each step is easier to follow.
- Check the finished craft against the instructions before displaying or using it.
FAQs
Is this tutorial beginner friendly?
Yes. This paper plate flowers paper craft is written with simple steps and extra tips for beginners.
Can kids make this craft independently?
Older kids may be able to work independently, while younger kids should have help with any steps that require close attention or small pieces.
How long does the craft take?
Most versions take about 30 minutes, depending on the materials and the pace of the crafter.
Can I use different colors?
Yes. Changing the colors is one of the easiest ways to personalize the finished craft.
Final Thoughts
Once the paper plate flowers paper craft is finished, take a moment to check the details, compare the result with the tutorial, and display the project somewhere kids can enjoy their work.
Affiliate disclosure: This post may contain Amazon affiliate links. As an Amazon Associate, Easy Crafts Ideas may earn from qualifying purchases at no extra cost to you.


