

How to Make St. Patrick’s Day Sensory Bottles
These St. Patrick’s Day sensory bottles are so fun! Whether you’re celebrating or just adding a seasonal twist to sensory play, these bottles are a simple, calming way to enjoy the holiday.
Step 1: Find what you need
-
- Gather your supplies and materials.
Step 2: Clean the water bottle
-
- Wash an empty water bottle and remove the label.
-
- Clean off any residue from the label using rubbing alcohol and a cotton pad. You can also soak the bottle in hot water and use soap to clean it off.
Step 3: Fill with baby oil and add-ins
-
- Pour baby oil into the bottle until it’s mostly full.
-
- Add shamrock and leprechaun coin confetti into the bottle.
- Shake gold glitter into the bottle as well.
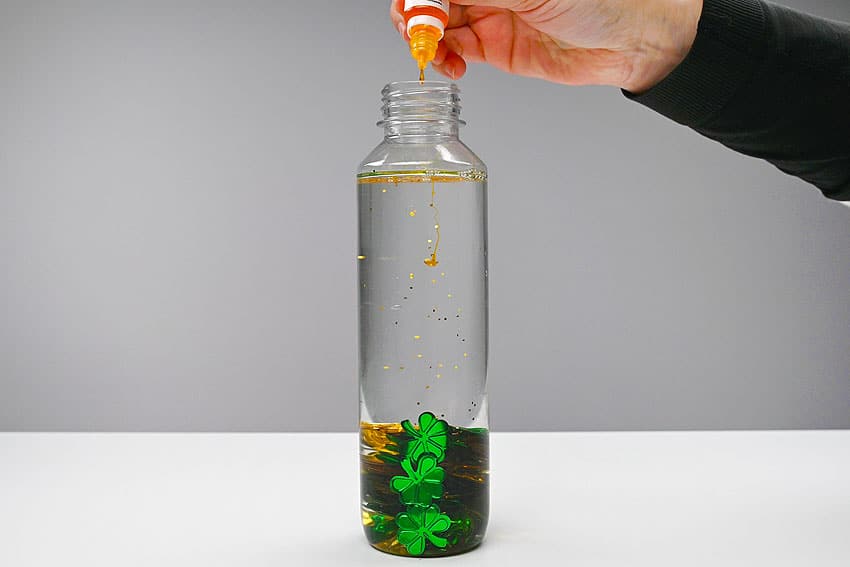
- Then add a couple drops of oil based food colouring. We used yellow here to represent gold, but you could use green as well.
Step 4: Top off the bottle and close
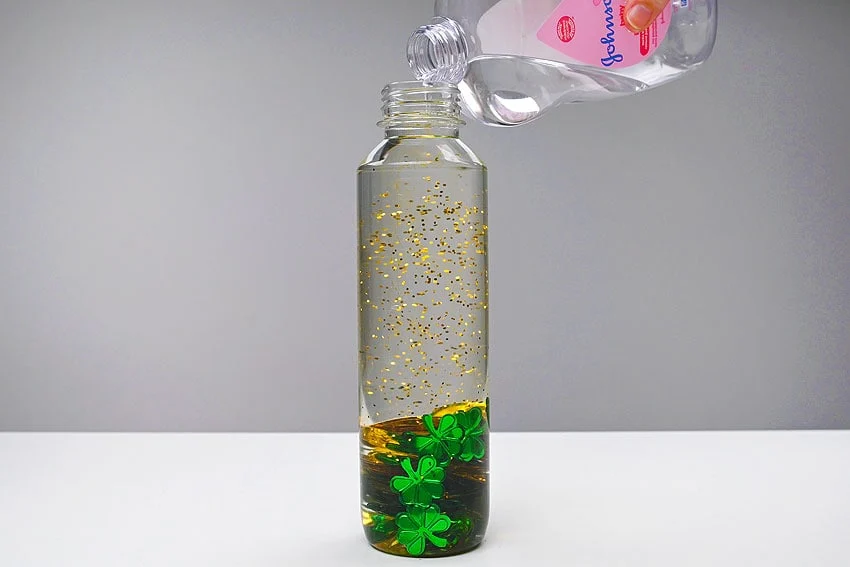
- Fill the bottle to the top with baby oil.
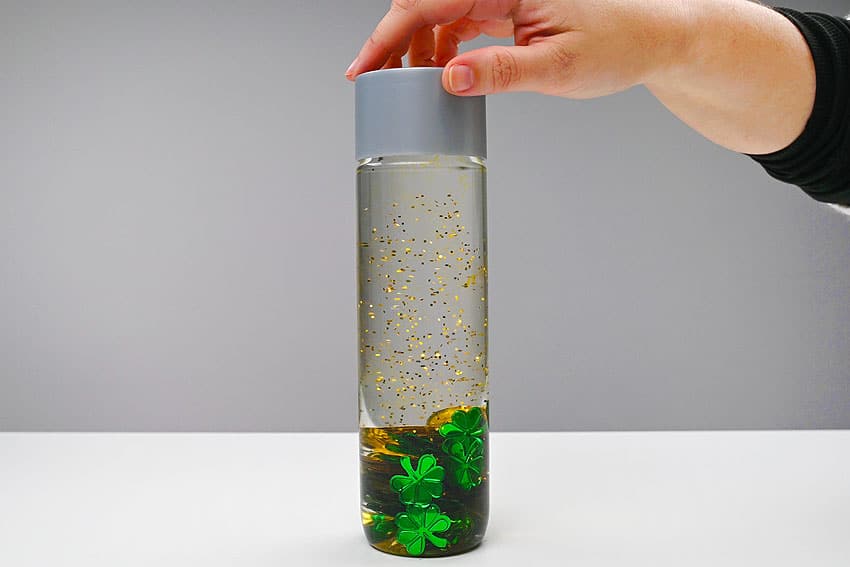
- Add the lid to the bottle and tighten well.
- Shake the bottle to mix the add-ins and the food colouring.
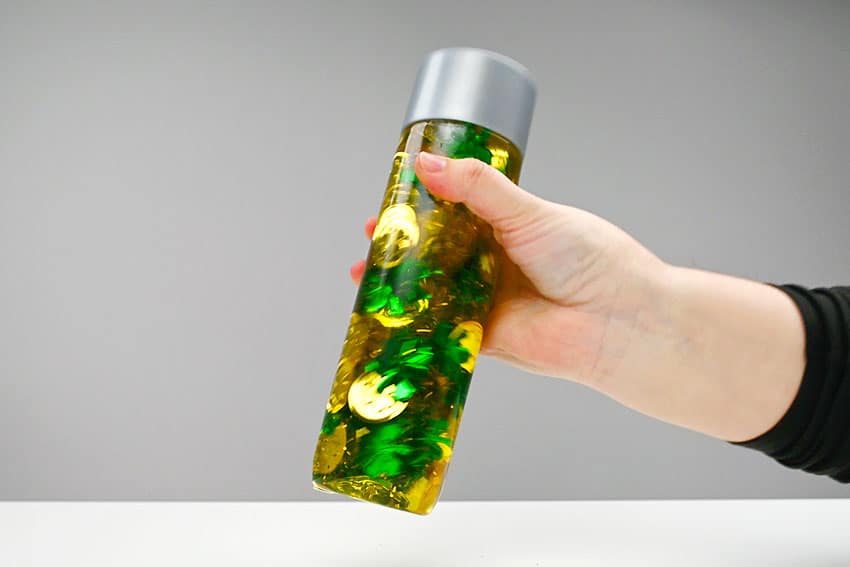
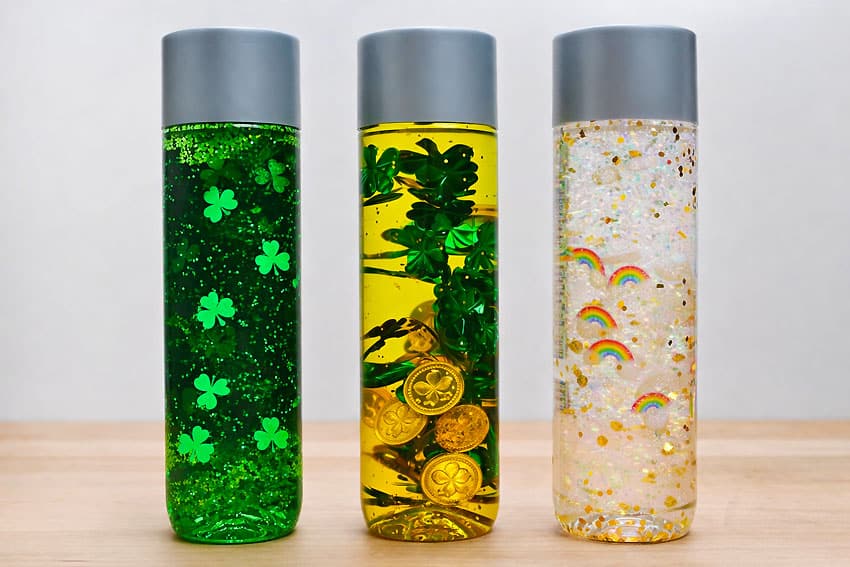
- Your St. Patrick’s Day sensory bottle is complete! Move the bottle back and forth to see the glitter and confetti float around the bottle.Then have fun making more sensory bottles for St. Patrick’s Day! Keep reading below for what we added to these other calm jars.
Helpful Tips
- Read through the full tutorial before starting.
- Prepare supplies ahead of time for younger kids.
- Let glue or paint dry fully before handling the finished craft.
FAQs
Is this tutorial beginner friendly?
Yes. This st. patrick’s day sensory bottles sensory craft is written with simple steps and extra tips for beginners.
Can kids make this craft independently?
Older kids may be able to work independently, while younger kids should have help with cutting, glue, or paint.
How long does the craft take?
Most versions take about 30 minutes, plus extra drying time if glue or paint is used.
Can I use different colors?
Yes. Changing the colors is one of the easiest ways to personalize the finished craft.
Final Thoughts
Once the st. patrick’s day sensory bottles sensory craft is finished, take a moment to check the details, let any glue or paint dry fully, and display the project somewhere kids can enjoy their work.


