Supplies Needed
- All-purpose flour
- Table salt
- Spoons or spatulas
- Measuring cups
- Small basin or large bowl
- Food coloring or tempera paint (optional)
STEPS
7Make several colors of dough.
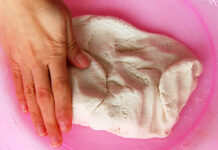
Make several colors of salt dough. You can make them a few days before using them. Store them wrapped in plastic wrap and then in a zipper plastic bag inside the refrigerator. Before using them, make sure they are back to room temperature. If they are a bit dry, just add a bit of water and knead.
8Use the dough for crafts.
Use the salt dough as you would sculpt play dough. The great thing about it is that the salt dough sculptures will harden if you leave them out to dry at room temperature. Depending on the size of the pieces, it will take 2 to 7 days to dry completely. Turn the pieces from time to time for faster drying.
9Oven dry the salt dough pieces.
Instead of air drying the uncolored salt dough pieces, you can bake them in a conventional oven at 200°F (93°C). The drying time depends on the thickness and size of the pieces. It can be as short as 30 minutes for small and flat pieces to several hours for bigger, thicker ones. To avoid browning, check on the pieces from time to time. You can also cover them loosely with aluminum foil.
Once done baking, allow the pieces to cool. Paint with tempera or acrylic paint. After the paint dries, seal in with a coat of polyurethane spray.
More Craft Recipes & How-To’s:


