Christmas Bow Wreath
This Christmas bow wreath is SO PRETTY!! Attach colourful gift bows to a wreath form for a simple and festive homemade holiday decoration.
You can make this DIY Christmas wreath in 1 hour or less, and you can find all the supplies at the dollar store! This winter project is really easy to make, and we love how cheery the gift bow wreath looks hanging on the front door!

This post contains affiliate links. If you use these links to buy something we may earn a small commission which helps us run this website.
DIY Christmas Gift Bow Wreath
Materials:
- Foam wreath foam(14 inch recommended)
- Gift bows(multiple colors and sizes)
- Sheer ribbon(color of choice)
Equipment:
Instructions:
Step 1: Find what you need
-
Gather your supplies and materials.We recommend sorting the gift bows by colour (and/or size) so you can tell what bows you have the most of as you add them to your wreath.


Step 2: Attach bows inside the wreath
-
Remove the entire paper/plastic back from the gift bow.


-
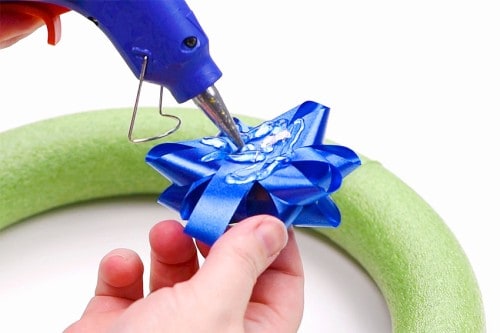
Add hot glue to the back of the bow.

-
Press the bow onto the inside of the wreath form.


-
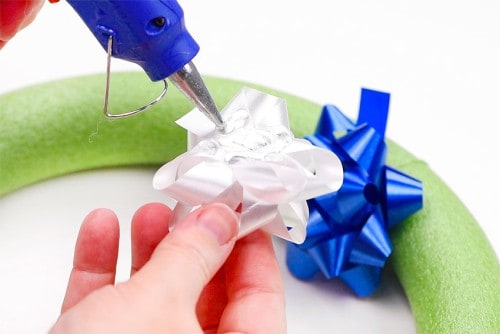
Add glue to a second bow after removing the backing.

-
Place this bow really close to the first bow. You want the sides of the bows to be overlapping.Press the bow to make sure it sticks in place. You may want to use a pencil or skewer to do this, to avoid hot glue on your fingers.


-
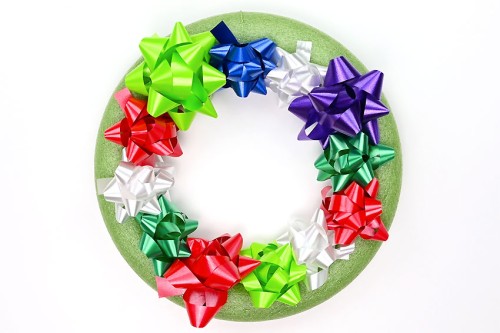
Continue to fill the inside of the wreath form with bows.As you add the bows you’ll want to space out the colours so they’re not right beside each other.

Step 3: Add more rows of bows
-
Now you can begin adding bows on top of the wreath form.Again, make sure you place the bows closer than you think you need. You really have to smush the bows together to avoid the wreath form showing through.


-
Continue adding bows to the wreath on the top and side.We like to add them randomly around the circle, rather than going in a particular order. This allows you to get the most of your colour selection.For example, place a red on top where there isn’t one directly inside.


-
Fill in any empty spots if your bows have slipped or are further away than you planned.


-
Continue adding bows until the whole wreath is filled.Be sure to look at the wreath from both the front and the sides. This will really allow you to fill in all the gaps.


Step 4: Attach a wreath hanger
-
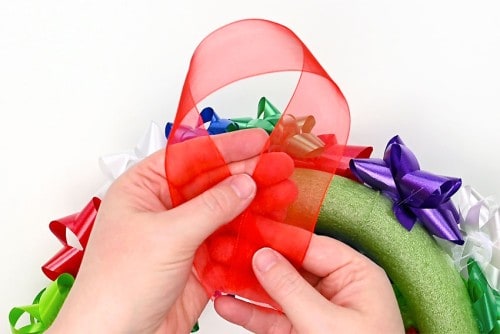
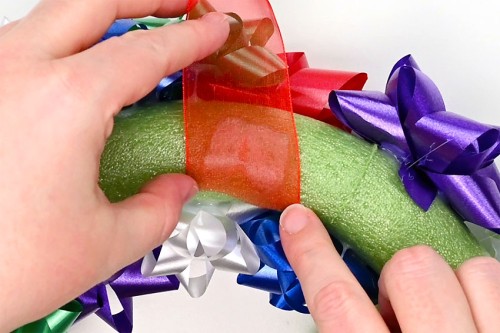
Cut a piece of ribbon between 14 and 16 inches long.

-
Add a generous amount of hot glue to the back of the wreath, just off from the top center.


-
Press one end of the ribbon into the glue. Be really careful, as the glue can seep through the ribbon easily.You may want to press the ribbon down with a pencil or skewer, or simply press down on the ribbon outside of the glue area.

-
Add the opposite end of the ribbon into more glue.Allow the glue to dry before flipping the wreath over or carrying it by the hanger.


-
Your Christmas bow wreath is complete!


Helpful Tips:
- If you’re worried about the styrofoam showing through the bows, wrap the wreath form in a complimentary colour of ribbon or fabric before gluing on the bows.
- Use a low temperature glue gun if possible. High temperature glue guns make the ribbon curl up, plus it’s a lot easier to burn yourself. (Not that we’re talking from experience, or anything…)
- You can also stick the ribbon hanger into the wreath with thumb tacks.


What size wreath is this Christmas bow wreath?
We made a larger 14 inch wreath and a smaller 10 inch wreath. The smaller wreath is what you see in the step by step photo and video tutorials. We definitely like the look of the larger wreath for a front door, but the small one is cute as well!
How many bows do you need to make a Christmas bow wreath?
We used 55 gift bows on our larger 14 inch wreath. There were 3 different sizes of bows from assorted packages.
We recommend having at least 70 bows on hand, if not more. This will give you a good variety of colours, and you’ll have extra in case some of the bows are crushed.
For our smaller 10 inch wreath we used 36 bows, but, again, we recommend having at least 50 bows to choose from.


Do I have to remove the backs of the bows for this gift bow wreath?
We definitely recommend removing the whole back of the gift bow – the part you’d typically attach to presents.
First, if you just add glue to the back of the bow as is, you have no control over whether the bow’s adhesive will fail. If the paper lets loose from the sticky part of the bow, the bow will fall right off your wreath.
Second, you can remove the back paper part and add hot glue to the sticky back of the bow. This works, because the tag is stapled to the bow, but we still don’t recommend it.
This way makes it harder to control where the bow sits on the wreath form. The paper sticks well to the styrofoam, but the bow itself can come up off the wreath and look weird. They just don’t sit right.
So, yes, we recommend removing the whole backing from the bow. It’s more time consuming, but it’s still the best way to do it. Occasionally a staple might fall off, but if this happens, simply staple the ribbon bow back together before attaching it to the wreath.


How can I hang up my DIY Christmas bow wreath?
We have a wreath hanger on our door, and think the ribbon hanger looks great on there. If you don’t have a special hanger, you can also hang the wreath on a command hook. On an interior door you can even hang the wreath from a push pin.
What if I don’t have a foam wreath form?
You should be able to find a foam wreath form easily, if you don’t already have one. They’re easy to find at craft stores or online, and we even bought our smaller wreath at the dollar store.
Otherwise you can also use a straw wreath or a wire wreath frame. You could even cut down a pool noodle and glue it together into a wreath shape.


A Christmas bow wreath is so much fun to make and the final result is super cheerful! Choose gift bows to match your winter decor, or make a multi-colored wreath like ours. Either way, your gift bow wreath will be an awesome way to welcome people to your home this holiday season!


Here’s even more DIY Christmas ideas:
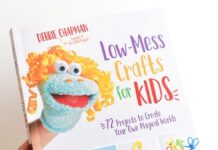
Our book Low-Mess Crafts for Kids is loaded with 72 fun and simple craft ideas for kids! The projects are fun, easy and most importantly low-mess, so the clean up is simple!
Where to buy:
You can purchase Low-Mess Crafts for Kids from Amazon, or wherever books are sold:
Amazon | Barnes and Noble | Books-A-Million | Indiebound | Amazon Canada


